If we look at the JavaScript APIs documentation we can see that there are three different ways that we can display a confirmation dialog:
- apex.confirm
- apex.page.confirm
- apex.message.confirm
Note
The confirm function from the page namespace is different from the one in the confirm namespace. They both render the same confirmation dialog though.
apex.confirm: Alias for the apex.page.confirm function.
apex.page.confirm: Displays a confirmation dialog showing a message (pMessage) and OK and Cancel buttons. Depending on the user's choice, submits the page setting the request value to pRequest, or does not submit the page.
apex.message.confirm: Displays a confirmation dialog showing a message (pMessage), and OK and Cancel buttons. The callback function passed as the pCallback parameter is called when the dialog is closed, and passes true if OK is pressed and false otherwise.
The following JavaScript code:
apex.message.confirm( "Are you sure?", function( okPressed ) {
    console.log(okPressed ? 'Ok' : 'Cancel');
});
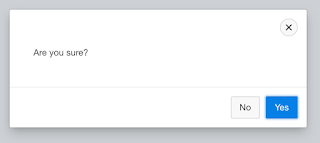
Would display this dialog:
Now, back to the original question. What if we would like to change those button labels.
If we have a look at the JavaScript code of the apex.message.confirm function, we can see that the labels are based on some apex.lang messages (APEX.DIALOG.OK and APEX.DIALOG.CANCEL) and that there is no built-in way to change the labels.
But...
What we can do is change the values (using the JavaScript API of the apex.lang namespace) of the two messages and then call the confirm function. We should also revert the changes to the messages after that so that everything remains as it was initially.
Ok, so let's create a wrapper function on apex.message.confirm (the same also works for apex.page.confirm) and add two parameters for the button labels.
The function could look like this:
function customConfirm( pMessage, pCallback, pOkLabel, pCancelLabel ){
    var l_original_messages = {"APEX.DIALOG.OK":     apex.lang.getMessage("APEX.DIALOG.OK"),
                               "APEX.DIALOG.CANCEL": apex.lang.getMessage("APEX.DIALOG.CANCEL")};

    //change the button labels messages
    apex.lang.addMessages({"APEX.DIALOG.OK":     pOkLabel});
    apex.lang.addMessages({"APEX.DIALOG.CANCEL": pCancelLabel});

    //show the confirm dialog
    apex.message.confirm(pMessage, pCallback);

    //changes the button labels messages back to their original values
    apex.lang.addMessages({"APEX.DIALOG.OK":     l_original_messages["APEX.DIALOG.OK"]});
    apex.lang.addMessages({"APEX.DIALOG.CANCEL": l_original_messages["APEX.DIALOG.CANCEL"]});
}
Then, calling our function:
customConfirm( "Are you sure?", function( okPressed ) {
    console.log(okPressed ? 'Ok' : 'Cancel');
}, "Yes", "No");
Would result in this:
or anything you want, like this:
You can have a look at it in action in my Demo Application
Enjoy!


